General Connection Settings
In this screen, you can specify which server should be used when you log in.
Click on any image below to view the full-size version. Click outside the image to return to these directions.
Click to jump to a section:
Adding a New Connection
To add a new set of server connection settings:
-
Make sure you are connected to the Internet.
-
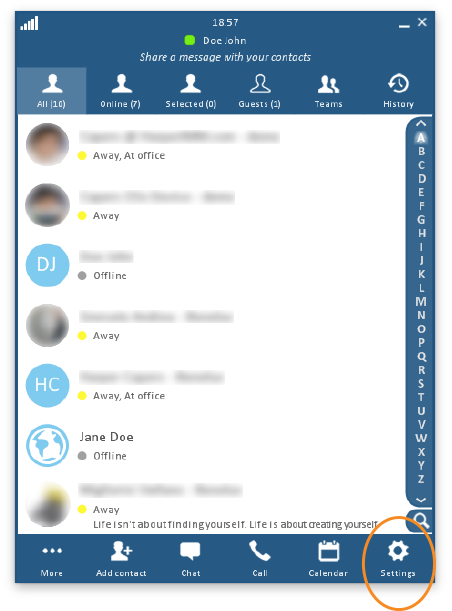
Click or tap the Settings button at the bottom right of the swyMed window.
-
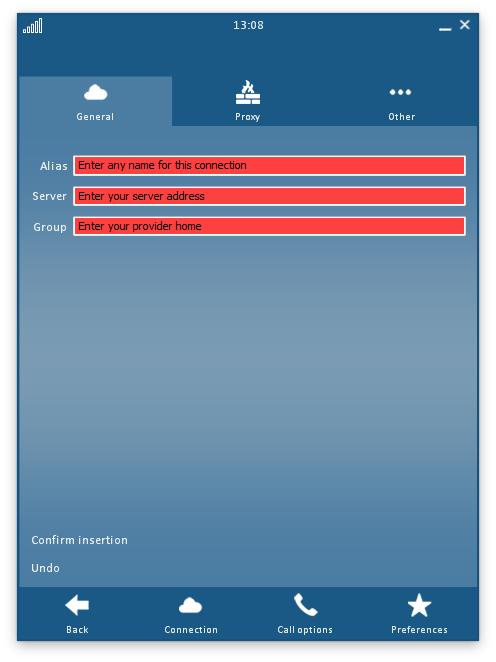
The General Connection settings will open by default.
Enter the following information:
- Alias – A name that identifies the connection and that is easy for you to remember
- Server – The IP address of the server through which you will connect
- Group – The domain (within the server) with which you will connect
-
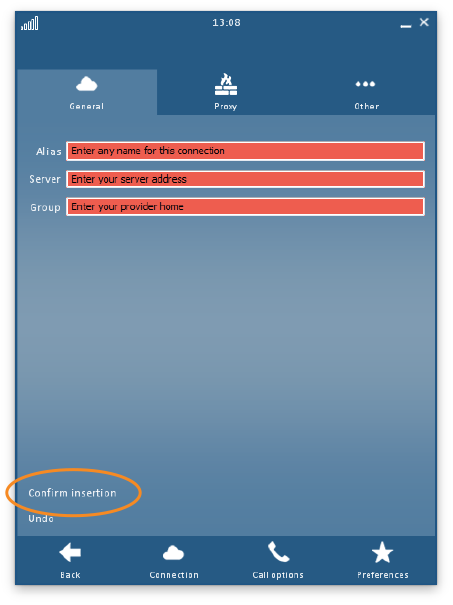
When you are finished, click the link Confirm insertion.
-
At the bottom left of the window, click the link Test...{your alias name}...connection. This will help ensure you have entered the information correctly.
-
When you are finished, click the Back button at the lower left to return to the previous screen.
Editing an Existing Connection
You cannot edit the connection on which you are currently logged in; you must first log out from this connection before you can make changes. Then, follow the directions for Launch and Login.
To modify a previously saved set of connection settings:
-
Make sure you are connected to the Internet.
-
Click or tap the Settings button at the bottom right of the swyMed window.
-
At the lower left of the window, click the text link Modify...{your alias name}...connection.
-
Make the required changes.
-
Click the text link Confirm update.
-
At the bottom left of the window, click the link Test...{your alias name}...connection. This will help ensure you have entered the information correctly.
-
When you are finished, click the Back button at the lower left to return to the previous screen.